herbcraft

Making InSense of left over Herb Stems

Written Feb 21, 2012

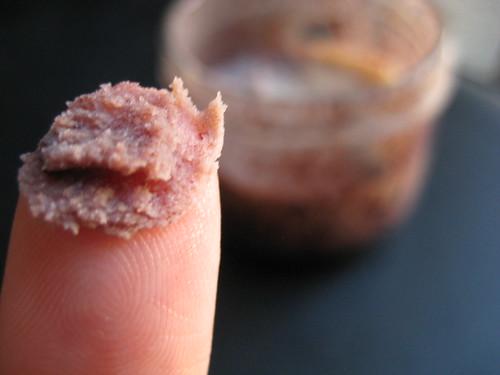
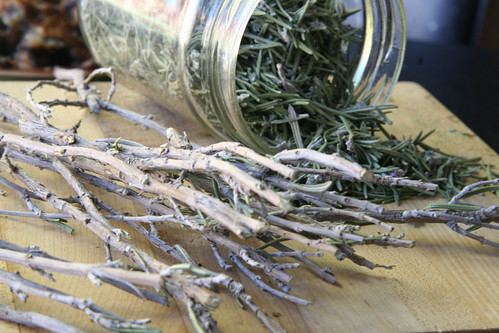
It's a smoke theme with the Wild Things Round up for February and I was going to share this old school post exposing my giant pregnacious belly making sacred burn bundles, but decided to talk about something a little more recent instead. Hope you enjoy. I really hate wasting any part of the plant. It is such a gift to sit with a plant and cut from it's bounty that I do my best to make craft of every little bit. We are not composting right now so my need to do this is even more intense. We recently grabbed a bunch of some crazy wild rosemary from my parents property in northern Arizona. After a week or so of drying, I garbled off the leaves and powdered up the stems in my Vitamix to use in an incense.

IMG_8633

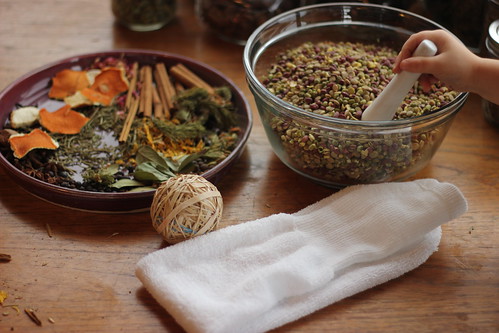
Making natural no additive herbal incenses is truly a spiritual experience. Blending and mixing and burning to get the just right smell can be mood altering....or maybe it's all the smoke in the air. Either way, it sets the tone for a pretty fun day. I used to sell some in my etsy shoppe, but it's a pretty time consuming endeavor so now I just blend it for myself now and then.

IMG_8669

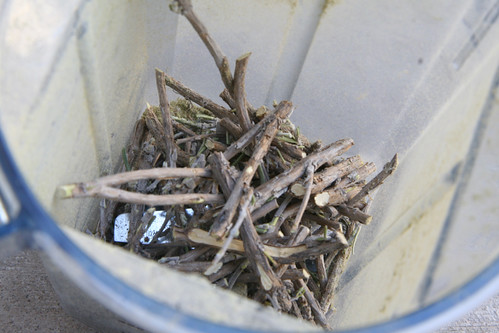
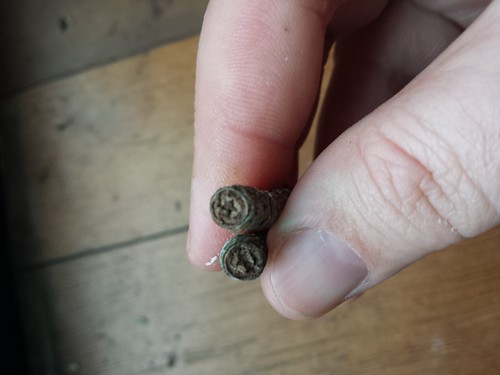
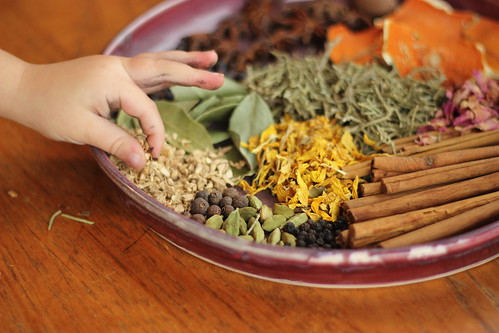
One of the most important ingredients in a homemade incense is wood. A good wood will keep it burning longer and hotter without needing the chemical additives or toxic salt peter and charcoal found in commercial sticks. I find most of my burnable scented wood in the most industrious way: these garbled stems of my favorite dried aromatic herbs. Rosemary, thyme, lavender, pine, cypress, and creosote are good options around here, but any woody herb will do. It's really acting as a heat conductor more than anything, so even if it hasn't retained any smell, it will still be helpful.

IMG_8673

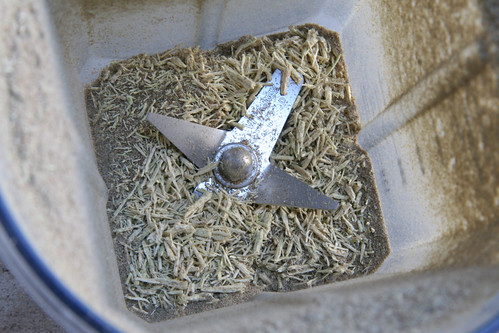
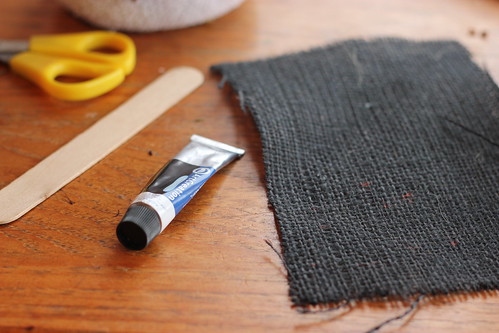
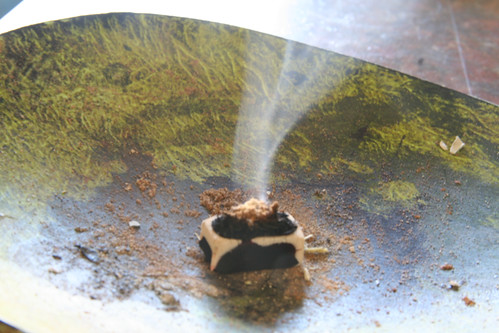
You can make sticks and cones by adding a little applesauce or makko powder and water to your blended herbs, but I make incense a pretty casual way, powder up a few favorite herbs and stems and burn them on a non-toxic, salt peter free bamboo charcoal brick. It's super easy to do, all you really need is an extra coffee grinder and you can even do it with your kitchen spices. So save your garbled stems and make some delicious homemade chemical free incense. Just popping in to add a link to this little silly video I made for a friend on how to burn loose incense with these bricks.

IMG_8676

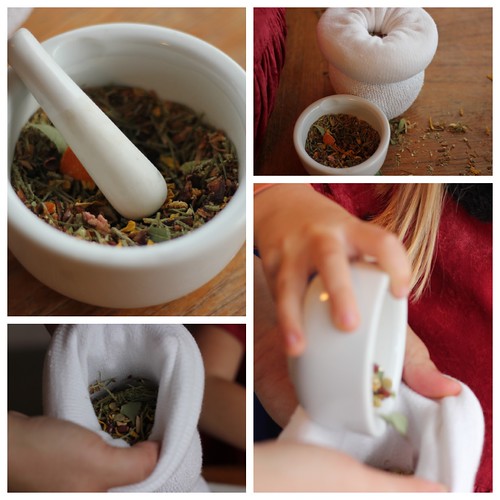
Memories are Magical Incense Rosemary stems Star Anise Citrus peel Lavender

Making Magic of the Moons

fb404fm

I've been thinking about this moon ritual all week. Well, all month really. But only just thinking. With no inspiration jumping out at me. Until last night. When I walked out to see her almost ripe behind the branches of our ancient oak tree. It was the first time in this cycle, I took the time to stop and notice her. Ritual doesn't have to be complicated or even full of witchy well-thought out meaning. For our family, is about slowing down to notice things. Notice moons new and ripe, notice flowers that some call weeds, notice silver minnows against the bright morning sky that think they are little birds. To pay attention to the wide and wonderous around us. There is beauty in the world, we just need to notice it.

I just might live in the enchanted forest.

This full moon is called the Pink Moon and the Egg Moon. I'll leave it to you to research the legend of the names. And I hope you do, it is a fascinating study of the first peoples and how on every part of the globe they *Noticed* the world, so much more than it seems we do at times now. And if you are a homeschooler, it is a perfect way to find a spontaneous lesson for the day. Here is a super fun and simple craft you can do tonight.

IMG_7961

Pink Moon Dyed Eggs Make a tea with 2 tb hibsicus flowers in a quart size jar of water. Boil the water, cover, steep, then strain. Hard boil a few eggs, then peel. Place eggs in a glass bowl, cover with tea. Set eggs out under tonights Pink Full Egg Moon. In the morning, she will have imparted her magic into your breakfast.

Love and Besos, Latisha, Sevi, and Sage

P.S. Don't forget to enter to win the giveaway for the wonderful ebook Wildly Nourished. Winner announced tomorrow. 

Cottonwood Crowns

We are still living fully in cottonwood city around here. After I made my oil, I didn't really feel like making anything other than wishes with the stems, but I couldn't just throw them out. So, they sat on my workshop table for a few weeks until I eventually decided to toss them onto the top of the garden beds to be mulched in eventually. Then one day as I was scrolling through instagram I saw these from Papier-Mache Magazine. I finally knew exactly what we had to do with our left over twigs. I love  Kirsten Rickert. Her dreamscapes and ethereal photos inspire me to no end. After seeing her tutorial, I was wishing I hadn't thrown my twigs away. Thankfully, Drew hadn't done anything with them yet but, they were covered in a foot of snow. So I went on a wee needle in a haystack hunt, snow shovel in hand, to find them. Much to my delight, the twigs were still very intact. Just in case, I set them out in front of the fire to dry a few hours inside and got down to making our crowns.

The girls selected their fabric from some scraps I had when I cut up some top sheets to make curtains. Does anybody use top sheets? I never have. Anyway, I don't do a lot of sewing on purpose, so I was surprised to find the iron still working, hidden in the back of a closet.

Today was a perfect day for crafting them. It took me a while to get the hang of the stitching, keeping the twigs straight and not fumbling around in my hands, but they turned out great. I ended up putting a layer of felt on the inside as they knobby cottonwood twigs were kind of hard on the forehead without. I also plan on sewing in some elastic on the back rather than tying them as she suggests in the post. It was so wonderful to use my hands and get crafty in this way. I really have missed just playing and making for no reason at all. I sat next to my love while he watched a show and just sewed by the fire. It was such good medicine. And speaks to the larger movement my heart and body is aching to make these days.

What do you think? Will you make some twiggy crowns? Cottonwood or otherwise? I'm thinking apple fairy and cherry goddess crowns next...

Love and Besos, Latisha

How the Cottonwood Got its Star

IMG_20140210_150427

There is a such a joy that comes with the deep study of one plant at a time. When I first started learning about herbs, I had to try everything. I was so hungry for the medicine I would buy pounds and pounds of dried plants to make with. Things for ailments I never really had and much went unused. I think this is pretty typical when I begin a new passion. I tend to gobble everything up all at once. But, now that I have a good foundation of the medicines that work for my family, I can study the plants from a different place with a slower more intentional pace. I'm learning things I never expected to learn. I feel closer and more in tune with the medicine. I'm not beating myself up over my first few years of voraciousness, just recognizing the path and appreciating where I've come.

I've always chosen one plant ally to really go deep with for each year, but with the creation of the monthly Plant Playbooks, I'm giving myself permission to dabble a bit beneath the surface for an entire month with a different plant when it is in its medicine prime. In fact, though I am sharing many more in depth offerings at HerbMother this year, this simple booklet has become my most favorite thing to make and share.

For the month of February we are working with the cottonwood tree and as usual, she has delivered deep medicine. I've created a pinterest board to collect the many inspiring things I'm learning about this majestic tree. One beautiful piece I came across that embodies the Art of Noticing, is the story of the Cottonwood and the Star. There are many versions of this story, including a beautiful CD with a live telling you can hear. I'd like to share my quick retelling and offer up a challenge below.

All things in life come from earth. When the stars were born, they ran around beneath the earth looking for a root to be born from. As they travelled, they heard laughter and joyful voices near the river. They followed the happy noise to a stand of cottonwood trees. Delighted by what they heard, they went into the roots, up the tree and hid out in the knotty twigs.

One evening, the spirit of the night noticed there were less and less stars in the sky. The spirit of the night called upon the spirit of the wind to help bring back the stars. The spirit of the wind knew the stars were hiding in the twigs of the cottonwood tree and so it created a mighty wind that would snap the branches from the trees. As the branches broke and fell to the ground, the stars shot out of the tree into the sky. To this day, if you break the twig of a cottonwood at just the right place, you will find a shadow where a star once hid.

20140210_150301

Here is my challenge. I will gift a free copy of the Cottonwood Playbook to everyone who submits their own unique story of how the cottonwood got its star. When we create stories with the plants in nature, we connect to them in a deeper relationship and we can see them as more than just trees and flowers to pass by. With your permission, the stories will be collected and featured on the herbmother blog during the month of February.

Send your stories to herbmother (at) hotmail (dot) com with the subject line: Cottonwood Star

I can't wait to hear your versions of how the cottonwood got its star. Even if you don't participate in the challenge, I do hope you are able to get out in nature and greet this wonderful ally in some way.

Love and Besos, Latisha

Spice Stuffed Snowfolks

single

Make some herb'n snowfolks! We got out the jars of our favorite holiday spices, some old socks and rubberbands, and made a giant mess. Easy enough for a two and four year old with just a wee bit of help from mama, this craft could take 15 minutes or a few hours depending on enthusiasm. We hope you enjoy and would love to see yours if you try em out.

First gather your snowfolk supplies. For the bodies you'll need white tube socks or tights, dried beans or rice or some other  sturdy filler, rubber bands, and herbs and spices.

IMG_6909

For the hats you'll need, paint, something to paint with and a small square of fabric.

IMG_6933

Next create your spice blend and set aside. We mixed and mashed ours up in a mortar and pestle, but you can just mix em in a bowl or a spice grinder if you like.

IMG_6904
IMG_6907

Next roll up your sock to the toe and fill the beans.

fill the beans

Then add your spices.

spices

Next close bottom "snowball" with a rubber band.

IMG_6922

Repeat above steps two more times.

IMG_6928

Cut extra sock material, but leave enough to make the top part of the top hat.

IMG_6932

Now decorate your snowfolks. We used orange peels, star anise, cinnamon sticks, cardamom, allspice, juniper berries and black pepper corns, but use whatever you have on hand. Or if you're two and your getting molars, have a munch on a cinnamon stick. We've had quite the adventure with teething pain, but this remains one of our favorite ways to soothe. Note to the Mamas: while I've used this pain relieving remedy with both my kiddos with no problems, cinnamon sticks can break into chokable bits, so do keep an eye on them. We try to only keep the largest heartiest ones for sucking. And the cinnamon can dry out and burn the lips some, but you have a good salve in your apothecary anyway for that right? ;)

IMG_6893

Finally the hats. I'm not so creative in this department, so you might have a better option like maybe making hats from paper or fabric, but we ended up using a circle of fabric and some paint. We cut a circle in the fabric and thread it through the sock extras then just used black paint (we had acrylic, but im sure craft paint will do) to paint it together.

hatbase
IMG_6938

The mess is mighty with the littles, but oh so very much fun, it kept them distracted for hours. And I'm sure there's some sensory/tactile edumacation something or other going on too. The smell is lovely if they sit on a shelf. But of course my girls have been playing with them all day so our house smells extra delicious. Sevilla promptly informed me we need to make another since we are four in our family. Perhaps, another day.....

trio

Turmeric Prayer Flags

prayer for witches everywhere

Happy Sunny Summer Solstice!!!! Celebrating the sun today with a root of its likeness: turmeric.

I've been wanting to write this tutorial forEVER. I made these prayer flags....last summer I think.  But I just never had the time to do it. You see, I couldn't for the life of me do the craft and take awesome pictures, and edit them into a gorgeous artful tutorial. I almost hesitated to even share it this week. But it speaks to the real story of the herbmama. My days are busy and filled with everyday life stuff too. And it would be unrealistic to represent myself in this space as a perfect artful herbcrafting mum all the time. So I'm sharing the post anyway, without perfect how-to pictures and a crappy set of instructions. Because it's a fabulous Summer Solstice craft and it really is rather simple. Besides recipes are made to be broken anyway. I broke several when I made this craft myself. The art of herbcraft lies in the experiment. Make it your own.

oct 372

Today is about something different. Herbs, plants, nature bits....they provide us so much more than clinical medicine. When we make a connection to nature in this way, through play, it feeds us as more than healing an ailment. It heals a broken lineage of working with nature. We don't need to buy fancy dyes in little tubes. We really can make our own with plants. When we play with our kids and make art with herbs, they remember, we remember. They remember that the same vibrant gold that colored their rice, colored the t-shirt they wear to bed every night. We are imprinting our senses with age-old traditions and making relationships. Reconnecting the lines of lost heritage.

oct 370

So to celebrate solstice today, venture  into the 'ethnic' foods aisle and grab some turmeric. Make some face paint, dye your hands, color some tee-shirts and paint them, or enjoy some steamy yellow rice with a bit of ginger. Experiment, grab a root and channel the sun, get yellow, and play.

oct 414

Dyeing with Turmeric: Fill a 4 quart sauce pan with water Add 1cup dried and powdered turmeric Warm until dissolved Add scraps of fabric, tee-shirts, etc you wish to dye Simmer until desired color achieved To check color simply remove from turmeric bath and rinse under cold water resubmerge if darker color is desired Bath can be used many, many times with success Note: you will stain your hands and anything in sight, but it will wash out within a few days.

oct 400

Love and Besos, Latisha

Cilantro Edamame Hummus

Sage, my little munchkin who rarely eats anything but meat devoured it. 


cilantro edamame hummus

Cilantro Edamame Hummus A giant bowl of shelled and cooked edamame A handfull of pepitas (pumpkin seeds) A drizzle of olive oil One big bunch or two grocery store boxes of fresh cilantro A head of garlic or four Some lime juice, salt, and pepper

Blend in a food processor. Enjoy with carrots, chips, pitas. Save some to share.

Love and Besos, Latisha

Candied Borage

Our garden is just starting to bloom like crazy and we are humming right along next to the bees making our harvest. The borage is always the first to grace us with her flowers and we've put together a few fun crafts with them. Borage flower vinegar. Though I usually use raw apple cider vinegar, I like white wine vinegars for this one because the flowers impart their beautiful color making a delicate pink brew and I cannot resist it. Collecting a few flowers each morning, being sure to leave enough for the bees, is a quiet meditative practice we enjoy as a family just after we wake.

IMG_0323
Borage Tea

I'm also enjoying a bit of fresh borage tea. A few flowers make the most sweet delicious cup. Their medicine is priceless to me.

IMG_0204

Finally, we've been making scrumptious candies to put in our other teas, on homemade sorbets, and just as little treats.

And.....here's a little video of our candy process. Hope you enjoy!

Borage Flower candies from Latisha Guthrie on Vimeo.

The simple sugar recipe I use is: 1/3 c sugar, 1/4 c water, 1 TB orange juice, and a dash of cinnamon. Melt everything together in a pan until dissolved and cool before using on flowers. Most any fun edible flowers will make great candies.

Welcome to Spring! What are you most looking forward to creating?

Love and Besos, Latisha

Pomegranate Inspirations

I've been entertaining the lovely Persephone and Aphrodite in my kitchen the last few days. I've been inspired to recreate some offerings I have not played with in some time. It's funny how pomegranate plays on the senses of women. Every time I write or post about it, the gals start to mmmmm and ahhhh and ooohhh, almost in a primal way. Like the very mention of this original forbidden fruit taps into something deep within our DNA. A history long since forgotten, retold to fit the needs of these times. But the wild woman stirs. The one who is curious not tempted, adventurous not disobedient, and sensual not sinful.

As our pomegranate begins to blossom and the heat bursts open the abundant fruit of her womb, I am reminded of all there is to be grateful for. The many seed of creativity, passion, and abundance that lives in a woman's heart.

Persephone Powder Goddess Skin Scrub, Aphrodite's Whisper Loose Herb Incense, Pomegranate Flower Essence Elixir.

Eczema Dream Cream

e

Recognize this? Eczema. I have been plagued with it as long as I can remember. My dad has it, so I know it's one of the gifts he passed down to me, but I also know it is exacerbated by stress, allergies, and heat. Two of which, living in the desert, are hard to avoid. The other, well I'm a bit type-A so that could be a whole other blog!

It's a dreadfully painful skin condition and super embarrassing when your a teenager, and I always get it on my face. I've gone through many cure-alls including watching my diet and even resorting to steroid creams when it got really bad. But the only thing that has kept it away is this dream cream. I read in one of Dr. James Duke's books that hibiscus was good for eczema, and at that point I only had a bag of tea that contained hibiscus, so I steeped it and placed it on the sides of my nose for 20 minutes. It worked like a dream and for the next few days, I was completely itch and rash free. The only thing was I looked like Rudolph. The tea stained my nose this lovely reddish purple color that did not come off for days. Annoyed, but excited about the results I put in an order to Mountain Rose and came up with a smooth cream, that while light pink in color, did not stain my nose but still did the trick.

e2

Eczema Dream Cream

3 tb hibiscus flowers

2 oz cocoa butter

Simmer flowers in 16 ounces of water.

Reduce until forms a sticky paste, about 2 ounces.

Heat cocoa butter in a double boiler and add hibiscus reduction.

Pour into sterile container and cool at room temperature.

Apply daily as needed.

IMG_8012

The cocoa butter adds a little bit of moisture to the area as well, soothing those itchy burning sensations while the hibiscus is busy healing the broken skin.

For Mountain Rose Herbs Recipe Contest -- bath and body entry